Tuesday, February 28, 2023

Dr. Seuss - Red Foot, Blue Foot


In this craft we are going to create our own foot book. It is an exciting craft for little ones!

What you'll need:

  • card stock
  • tempera (washable) paint 
  • paintbrush 
  • marker 
  • stapler and/or glue
  • and feet! 
Directions:

  • Use 3 sheets of cardstock, folded in half like a book. It helps to have your wording at least roughly planned out ahead of time so you can figure out how many sheets you need. Then, I painted my sons feet for the first round of pages!  
  • We had to do this in shifts to let the paint dry (it would be faster to have the pages cut, do it all at once, then glue pages back to back).
  • My husband, myself, and my daughter also did this.
                   Therefore, you have:                        

                                                              One foot, Two feet
Red foot, Blue feet
Left foot, Right foot
A foot that is BIG, a foot that is small,
My Husband had the biggest foot of course

Wednesday, February 1, 2023

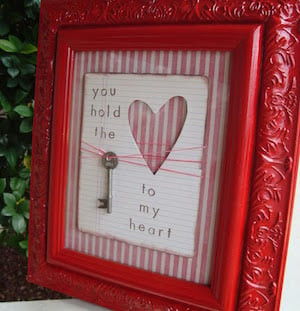
Picture Frame- Key To My Heart

                                             Keys to My Heart Art valentine craft for adults


This frame is a great way to show your significant other how much you care for them on Valentines Day and it would as be a great center piece if you do a candle light dinner for you significant other.

What you'll need:
  • Thrift store frame
  • Decorative paper
  • Scrap paper
  • Heart
  • Markers
  • Key 
  • Twin or cord
  • Glue

Directions:
  • First thing to do is make sure you have all your supplies on your work area and ready to go
  • Grab your decorative paper and your scrap paper, on your scrap paper cut out your heart and write your message
  • After that's done then take your key and twin and glue it to your scrap paper 
  • Then glue your scrap paper to your decorative paper
  • Put it in the frame and your all done


Tuesday, January 31, 2023

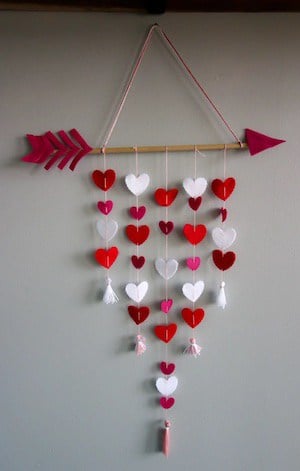
Cupids Arrow Wall Hanger

                                           Cupid’s Arrow Valentine’s Day Wall Hanger craft

If your getting ready for Valentines day and your want to try something new you could always center your decorations around Cupid this year. This Cupid's Arrow is a great way to get started on that. 

What you'll need:
  • Red, pink, and white felt
  • Red, pink, and white yarn
  • Hot glue gun and glue
  • scissors
  • stick or rod of some kind
Directions:
  • First thing you need to do is gather all not your supplies in one area
  • After that's done then you can start cutting out your hearts and other designs that you'll need
    Note: I would recommend starting with the arrow and then letting it dry, and then move on from there.
  • When that's done your can heat up your glue gun and start putting together your arrow
  • After the arrow is dry then add your hearts onto your yarn (make sure to use a little hot glue to keep them where you want them).
  • Then you can glue your yarn to your stick or rod, as well as adding some to the top of rod so you can hang it properly.


Note: Make sure to wrap the yarn around your stick along with your glue so that it doesn't just pull off.

Monday, January 30, 2023

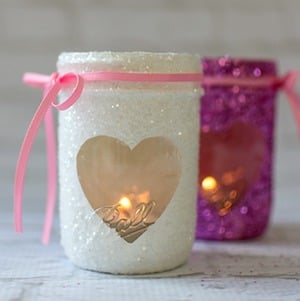
Valentines Glitter Candle Jar

                                                heart Glitter Votive mason jar craft for Valentine's Day


This Valentines day craft is a great way to show off your candle holders during the month of February. It's a simple craft to do that will make your table look more festive. You will also get to play with a lot of glitter so it's a win/win.

What you'll need:
  • Mason Jar
  • Glitter white and pink
  • Foam heart stickers
  • Ribbon
  • White and Pink Acrylic paint
Directions:
  • Once you have all the things you need in one place then you can start by attaching the foam heart to your mason jar.
  • After that you can paint and glitter your jar, let dry and then pull off the attached heart. It's quit simple and will be very cute
  • Then all you have to do is tie your ribbon around the top and add your candle

Note: You can use any color paint or glitter, as well as using other decorations if you would like.

AND THATS IT! YOUR DONE! JUST ADD TO YOUR TABLE DECORATIONS FOR A FESTIVE VALENTINES LOOK!


Tuesday, March 8, 2022

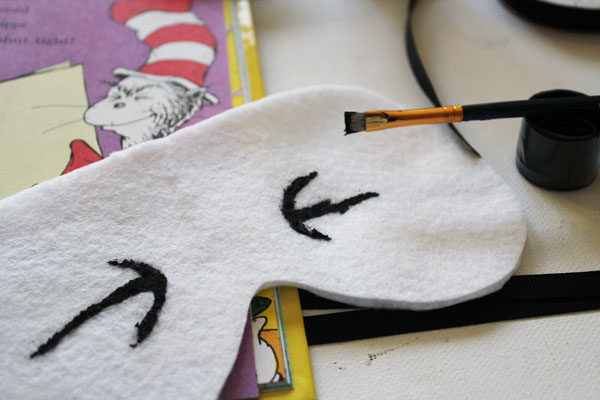
Dr. Seuss - I Can Sleep With My Eyes Shut Mask

        paint eyes on seuss mask


 I Can Sleep With My Eyes Shut is one of the great books that Dr. Seuss created. We all act a little silly with our kids from time to time even when they start getting older, so I tried to read with my eyes closed and my kids thought it was hilarious. I also made this craft for them so they could have a little bit of fun too!

What you'll need:

  • White Felt
  • Black Ribbon
  • Scissors
  • Black Paint and Paintbrush
  • Glue
Directions:
  • Start by cutting out your sleep mask shape. You can use an existing sleep mask as a template, or just fold your felt in half and cut. You’ll need two pieces of felt cut the same size.
  • Using a page from the book as your guide, paint on the squinted eyes. It doesn’t have to be perfect, Dr. Seuss illustrations don’t have many straight, perfect, or even lines… which makes it great for doing free-hand!
  • Then paint on the eyebrows. Or, well, unibrow, I suppose. A nice big, broken, squiggly line across the top.
  • Glue all the way around the edge of the bottom piece of felt, tuck in the ends of the ribbon, and press the top felt down on top. Allow to dry, and you’re all set!

Monday, March 7, 2022

Dr. Seuss - If I Ran A Zoo Craft

                               circus treats, dr seuss inspired crafts, dr. seuss, projects dr. seuss


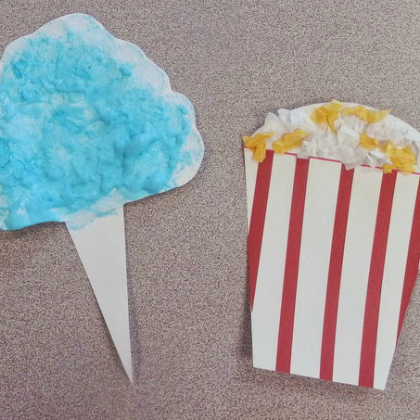
This is a simple craft for kids to do and they'll enjoy doing it. My kids made food but there are many different things you can do such as a tent, animals, and clowns.

What you'll need:

  • Construction Paper 
  • Tissue Paper 
  • Scissors
  • Glue
Directions:
  • So I cut out the shapes for this craft so we would have enough time for finish before our time was up.
  • All your have to do is let the kids decorate it and your done its that simple!

Sunday, March 6, 2022

Dr. Seuss - Sleep Book Craft

                                           The Sleep Book Paper Plate Craft


This  craft will encourages children to read, retell the story, and create. It's also a great way for kids to work on developing their fine motor skills and listening comprehension.

What you'll need:

  • Dr.Seuss Sleep Book
  • Paper Plate
  • Yellow Paint
  • Paint Brush
  • Yellow Curling Ribbon
  • Yellow Construction Paper
  • White Construction Paper
  • Glue
  • Scissors
  • Black Pom Pom
  • Black Marker                     

  • Directions:

    • To begin making this book-inspired craft, your kids will paint a paper plate with the yellow paint. You can also buy yellow paper plates to save time.  
    • After the paint dries, your children will glue the black pom pom in the middle of the paper plate. If you don't have black pom poms, they can cut a circle out of black construction paper. 
    • Next, your students will draw a mouth at the bottom of the paper plate with the marker.  
    • Then, your kids will cut the yellow curling ribbon in strips that are about four inches long. Before attaching the ribbon the plate plate, tape the ends together it a bunch so it is easier to glue. After taping the ribbon together, your kids will glue it on the back of the paper plate so the ribbon sticks out of the top for the hair.  
    • While the glue dries, your students will cut one circle or oval out of the yellow and two circles or ovals out of the white construction paper. Next, your kids will fold and cut the yellow circle or oval in half. They will then glue them onto the top of the white circles ovals to create Van Vleck's droopy eyelids. 
    • After gluing the circles or ovals together, your students will attach them on the center of the paper plate. Finally, they will then draw a semi-circle on the white ovals using a black marker for the pupils.  

    Saturday, March 5, 2022

    Green Eggs And Ham Slime


    This fun Green Eggs and Ham craft is for kids of all ages. This green eggs and ham slime is another idea for one of Dr. Seuss' great books.

    What you'll need:

    Directions:

    • Start by making your slime. Keep in mind, you want 2 separate bowls of slime. 1 bowl of white slime and one bowl of green slime.Each bowl of slime will require the bottle of glue, 1/2 cup liquid starch and 1/2 cup water.
    • For the white slime, just combine all of the ingredients, mix well and set aside.
    • For the green slime, make it just like you did above except you want to add 3-4 drops of green food coloring and 2-3 drops neon food coloring to the glue before you add the water and liquid starch.
    • You can add more or less food coloring depending on the color you want it to be. Just keep in mind the color will be a bit lighter after you add the liquid starch since it’s white in color.
    • Once your slimes are made, add some of the white slime onto a plate or table and make it an egg shape. Then add a smaller amount of the green slime on top as the “yolk”. 

    • You will then have some ooey, gooey green eggs that are totally fun to play with!


    Friday, March 4, 2022

    Dr. Seuss Pancakes


    This is partly food and partly craft. If your kids love The Cat In The Hat and pancakes, they will definitely love doing this.

    What you'll need:
    • All you need to make your own pancakes are a condiment bottle filled with pancake batter, a bunch of sliced strawberries, and some whipped cream.
    Directions:
    • Once you have sprayed your griddle and it is nice and warm, just use the condiment bottle to freehand a hat shape.
    • After your pancakes are cooked and cooled all you do is alternate rows of strawberries and cool whip, until you get these cute Cat in the Hat pancakes!


    Thursday, March 3, 2022

    Thing 1 & Thing 2

                                   Thing 1 and Thing 2 Paper Roll

    Dr. Seuss Cat In The Hat is among one of the favorites for kids. This craft is is featuring Thing 1 and thing  2 from Cat In The Hat.

    What you'll need:

    • Paper rolls
    • White card stock
    • Red paint (and a paintbrush)
    • Black pencil
    • Scissors
    • Blue yarn (and a pom-pom maker if you have one)
    • Elmer’s school glue
    Directions:
    • Begin by painting the paper roll with red paint and set aside to dry while you continue with the next steps
    • Using either a pom-pom maker, or alternatively 2 pieces of cardboard cut into donuts make two blue pom-poms.  You don’t want them to be thick and full pom-poms though, you want to be able to make them look a little like messy hair
    • Using a stencil or cookie cutter, cut out four circles from white card stock; you need two circles per paper roll.On two of the circles using a black pencil, write THING 1 and THING 2.  On the other two circles draw faces.
    • Assemble your Thing 1 and Thing 2 paper rolls using Elmer’s glue.  Place a thin layer over glue around the top of the paper roll to attach the pom-pom hair, and then add a little to the back of each white circle and attach those too
    And that's all there is to it!!!!

    Wednesday, March 2, 2022

    Horton Hears A Who

             Paper Plate Horton Hears a Who Craft styled image.

    In Dr. Seuss' Horton hears a who, Horton is needed to help save the whos' that lives on the flower. So he takes a long journey to help put the whos' on a mountain so they can still live. So in this craft we're going to make a paper plate craft of Horton carrying the flower.

    What you'll need:

    • Paper plate
    • acrylic paint (blue or gray)
    • straw
    • construction paper (white and black)
    • Pom Pom 
    • scissors
    • glue
    Directions:
    • First paint the plate and let it completely dry.
    • Then cut out the middle top and bottom, it should look like this after you've cut it

                                 Cut top and bottom from plate.
    • After that's done take the two cut pieces, glue them together for the trunk, and then cut a whole in the end big enough for the straw
    • Cut two small ovals from your white construction paper: then two slightly bigger ones from your black construction paper, glue the white pieces onto the black pieces for the eyes
    • Then glue your eyes to the middle of the plate and your trunk to the middle of the bottom, it should look like this when after you've finished that        
                                                                                            
                                Glue eyes and trunk on plate.
    • Now glue your Pom Pom to the top of your straw and insert it into Hortons trunk
    And that's it for this craft! I hope you and your kids enjoy this craft like my family did!!!

    Tuesday, March 1, 2022

    Dr. Seuss- One Fish, Two Fish


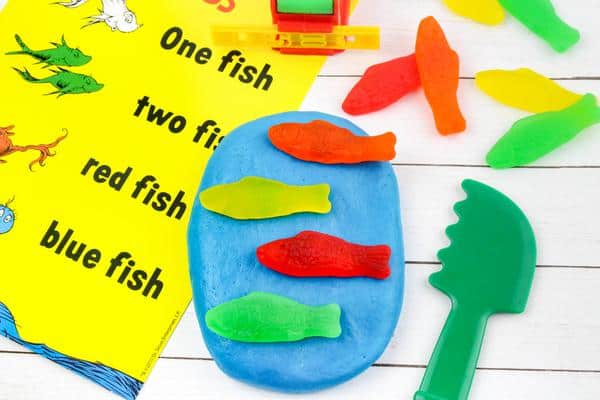
    Dr. Seuss was great at writing books that would get kids imagination going. In his book one fish, two fish he was able to bring out the kids imagination with different color fish and numbers. So also in this little craft we're gonna work with colors and numbers.

    What you'll need:
    • Different color construction paper
    • glue
    Directions:
    • Have the kids cut out their lake, trees, and different color fish first.
    • After they have that done let them glue it all together.
    • While the craft drys read the book to them 
    • Once the craft is completely dry, let them count the fish and name the colors

    Note: It would also be a good idea to have the book with you as well.

    Note: It would also be a great idea to let them name their fish. Also, it would be fun for them if you let them eat sweetish fish or colorful goldfish for a snack while your reading the book.

    Monday, February 28, 2022

    The Lorax Trees Craft

                                      DIY Truffula trees - a colorful Dr. Seuss craft kids can make after reading The Lorax


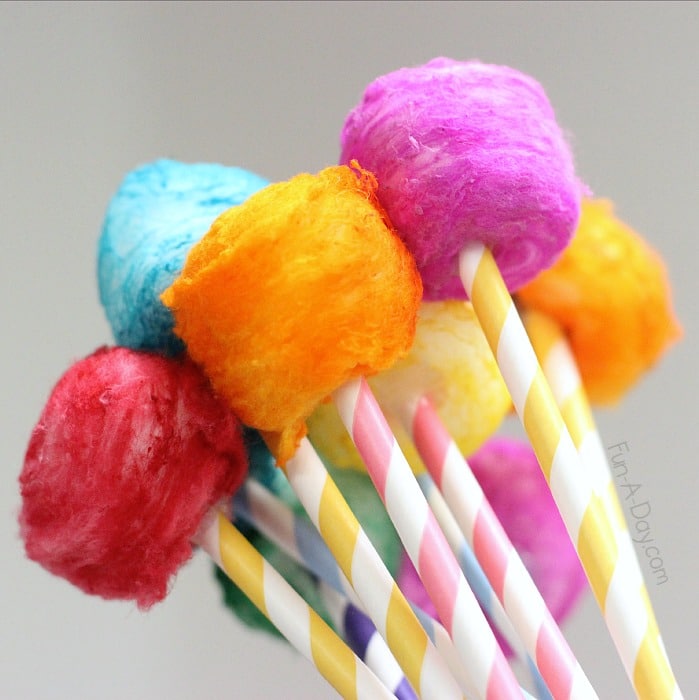
    Since Dr. Seuss' birthday is at the beginning of March. Then March is a great time to explore different crafts from his books or the cartoons. So today we're gonna do The Lorax Trees. These trees are colorful and fun to make. 
    What you'll need:
    • Stripped paper straws
    •  Large Pom Poms 
    • Hot glue
    • All you need to do is hot glue the Pom Pom's to the paper straws and your done

    Directions:
    If you would like you can attach them to a window or wall with tape. Or you put them in a pot. There are a lot of things you can do with these little trees. Have fun and be creative.

    Monday, February 14, 2022

    Valentines Owl Card

                                                          Kids Homemade Valentine's Day Card

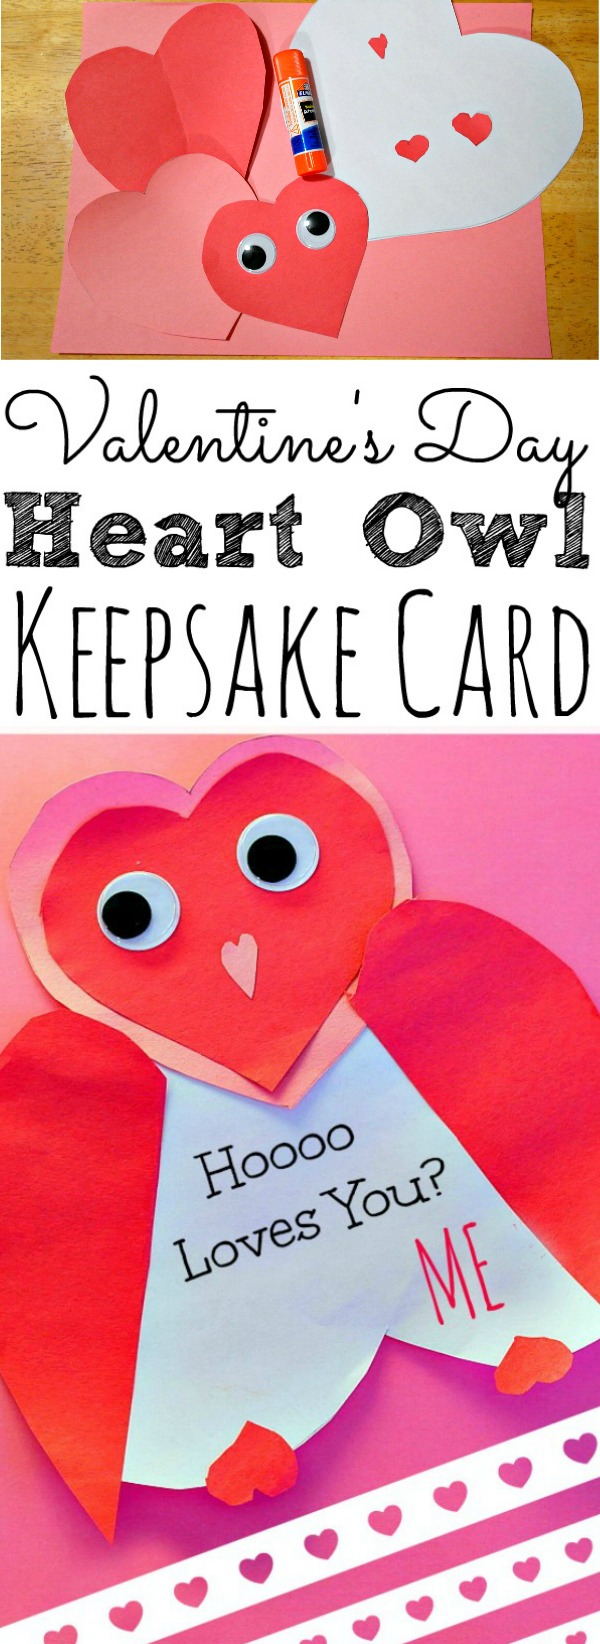
    This little owl is perfect for a Valentine’s Day card that you can give to mom, grandma, and anyone they would love to gift it too.

    What you'll need:

  • Red, white, pink construction paper
  • Scissors
  • Glue
  • Googley Eyes- Large
  • Pencil

  • Directions:

    Cut heart shapes out of each color paper as follows.

  • 1 large white heart- for the body
  • 1 large red heart- for the wings
  • 1 pink heart, about half the size of the white one- for the head
  • 1 red heart a little smaller than the red – for the face
  • 2 red small hearts- for the talons
  • 6.1 really small pink heart- for the beak

  • Place the white heart with the rounded (top) part facing down towards you. Glue the pink heart (the head)over the point of the white heart. Then layer the red face heart onto that.
  • Cut the red wing heart in half. Glue one on each side of the body, point facing down. (refer to photo)
  • Glue the googly eyes and pink beak heart onto the face.
  • Glue the talons onto the bottom of the body.
  • Sunday, February 13, 2022

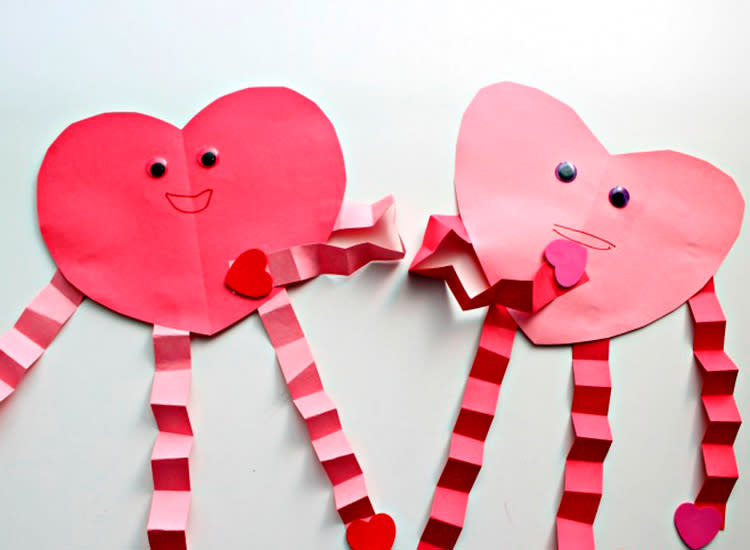
    Valentines Heart People


    These little cuties can be used for imaginary play, be hung up as a decoration, or be given to your childs school friend as a easy valentines gift. The best part about it is that your child will have fun making it and be excited to give it to his/her friend. Your child can even write a little note on the back to their friend such as best friends forever.

    What you'll need:

    • Red and pink construction paper
    • Foamy sticker or non-sticker hearts
    • Googly eyes
    • Scissors
    • Craft glue
    • Crayons or markers
    Directions:

  • Help your child cut out a large heart in their favorite color.
  • Choosing another color, cut out 4 strips, which your child will fold into an accordion. These will be the legs and arms of your heart.
  • Glue or stick on the foamy hearts to the end of each accordion strip. These will be your heart’s hands and legs. 
  • Have your child glue on the arms and legs on the heart.
  • Glue on the googly eyes and draw a smiley mouth using a crayon or marker. 
  • Allow the heart to dry completely so that the arms and legs do not fall off.


  • Saturday, February 12, 2022

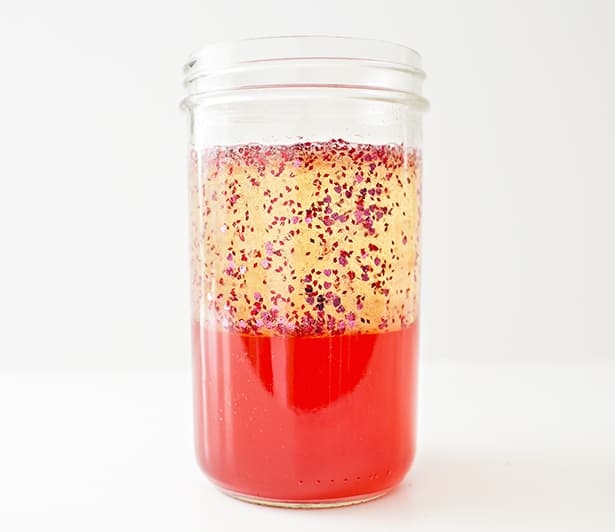
    Love Potion Lava Lamp


    Kids can make these cute lava lamps very easily and the kids will be mesmerized by them. Kids will want to look at them forever and ever!
    What you'll need:
    • tall jar ( such as a mason jar)
    • red food coloring
    • water
    • vegetable oil
    • heart glitter
    • and alka-seltzer ( tums won't work)
    • Fill about 1/3 of your jar with water, then add vegetable oil but make sure to leave a little room so it doesn't bubble over the top 
    • Next, add the red food coloring and a tablet or two of Alka-Seltzer and watch the red bubbles float to the top
    • And then add more glitter along with another tablet or two of Alka-Seltzer. And watch the magic come to life right in front of your eyes

    Directions:
    Note: The more you add, the more fizzy the potion

    Friday, February 11, 2022

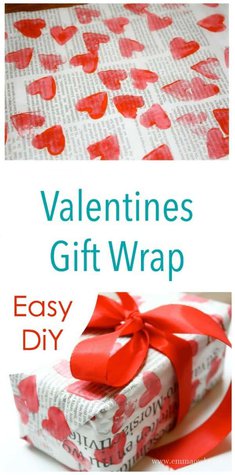
    DIY Valentines Gift Wrap

                                                       Make your own Heart Valentines Gift Wrap  - Great money saver and craft project!

    So, this is a great way for kids to wrap up a present for a special someone.... a grandmother perhaps! It is fun and creative and kids would love to be involved in this little activity!
    What you'll need:
    • paper from an old book, newspaper, magazine pages
    • heart stamp
    • tape 
    • ribbon or yarn
    • The first thing you need is to collect all your supplies in one area so it makes it easier to do this little craft
    • Once you have everything set call the children and let them stamp whichever type of paper you chose 
    • After the stamps are dry help the kids wrap that present and decorate it with a bow.

    Directions:
    Note: you can also let them use different heart stickers, let them draw the hearts and decorate, and also another fun way is to let them write their I Love You's on it as well.
    And that's it!!!! Their ready to give their gift to a special someone!!!! Make sure to let the kids know that they'll be getting lots of kisses for this little gift wrap!!!!!

    Thursday, February 10, 2022

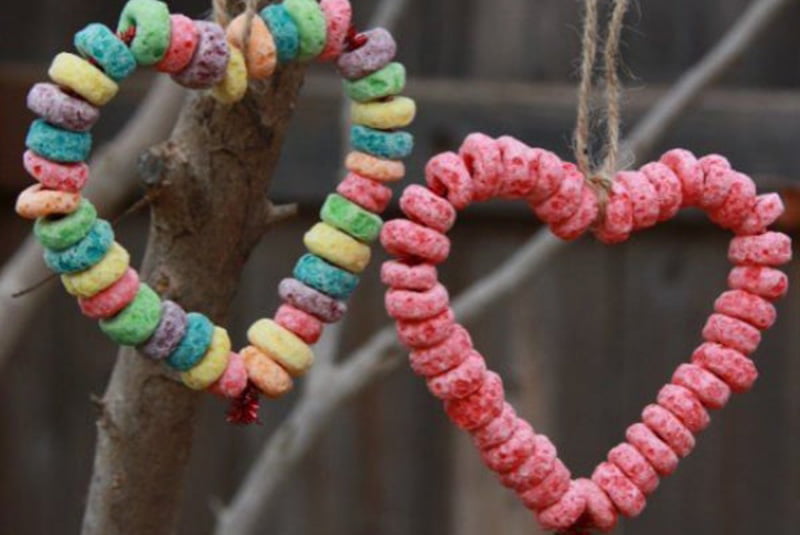
    Valentines Bird Feeder

               Fall Crafts for Kids: Birdfeeders - Heritage Custom Builders


    If your kids love animals and like to feed them then this is a great craft to try with them. All young age kids will love making it and being able to feed the birds at the same time.
    What you'll need:
    • pipe cleaners
    • cereal
    • yarn or twine
    • This craft is very easy to do. All you do is put the cereal on the pipe cleaners and then twist the bottoms together. After that simply make into a heart shape and tie your yarn or twine around it and your ready to hang them on the tree for the birds

    Directions: 

    Wednesday, February 9, 2022

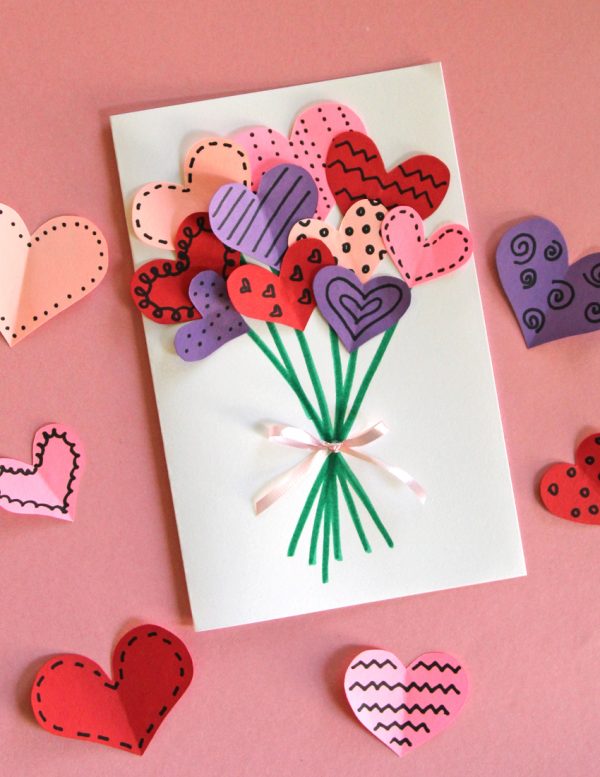
    Flower Heart Card

                                                      25 Easy Valentine’s Day Craft for Kids that are fun and simple.

    This Valentines card is a great way for kids to show their mom, grandmother, and aunts how much they love them this Valentines day. It will be a card that is kept among the favorite keepsakes for generations!

    What you'll need:
    • Different color construction paper
    • markers
    • glue 
    • ribbon
    • Cute out several different color hearts in different sizes and decorate 
    • Fold one sheet of construction paper to make card and glue on hearts after you get them decorated
    • Once that's done take your markers and draw a line from the bottom of the hearts to bottom of page
    • Then take the ribbon and make a small bow and glue over the lines

    Directions:
    Note: You can use stickers, glitter, Pom Pom etc.
    I hope you have a great time making this little craft for your loved ones!!!!!!

    Tuesday, February 8, 2022

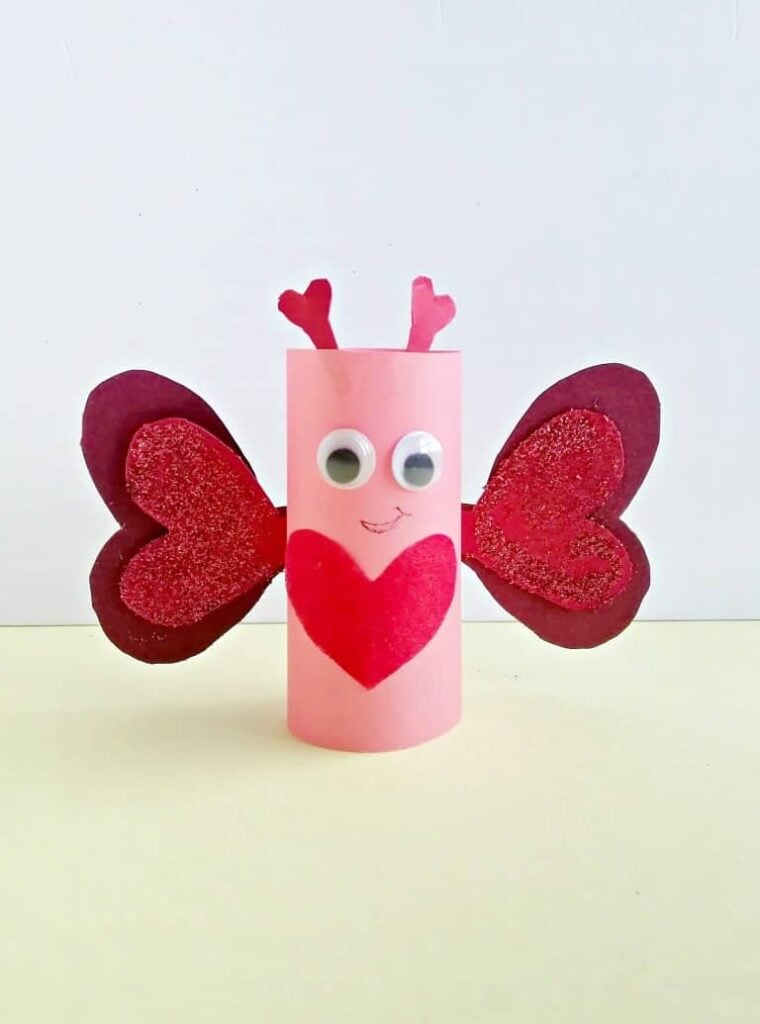
    Valentines Butterfly

                                                 Valentine's Day Butterfly Craft


    This little butterfly is great for kids on Valentines Day! I'm just going to skip the chatter today and get straight to telling you how to make this little cutie.

    What you'll need:

    • construction paper
    • scissors
    • glue
    • glitter
    • goggly eyes
    Directions:
    • First, cut the construction paper to the size you would like the body of your butterfly and glue ends together
    • Next cut out all your hearts ( my daughter also used smaller hearts for the antennas)
    • Once you have everything cute out you can glue everything on and sprinkle the glitter on 
    Note: You can also use stickers and crayons to decorate your butterfly more. Most importantly is to be creative and have fun!

    Dr. Seuss - Red Foot, Blue Foot

                                       In this craft we are going to create our own foot book. It is an exciting craft for little ones! What you...