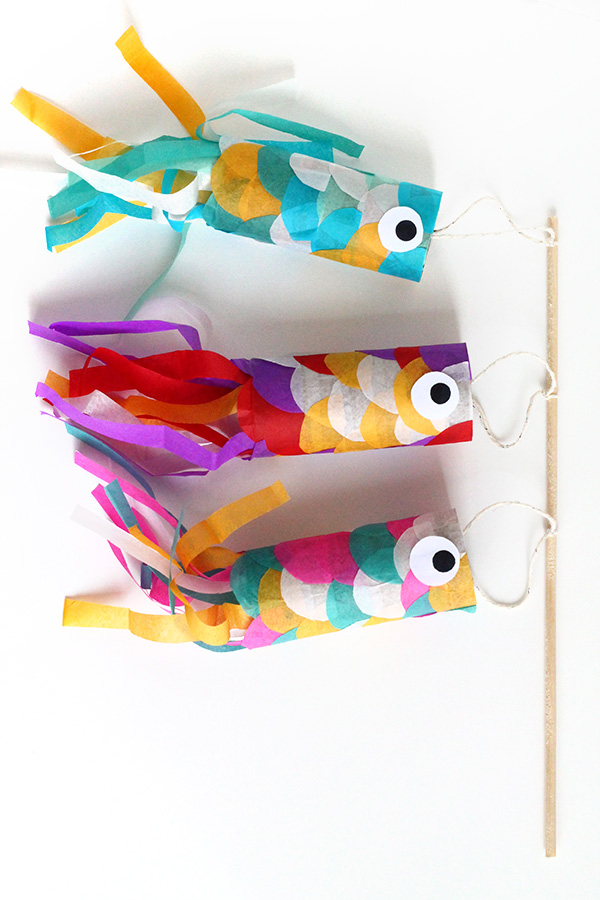
These aren’t for hanging high above your home, but you can certainly wave them around and watch the pretty colors fly!
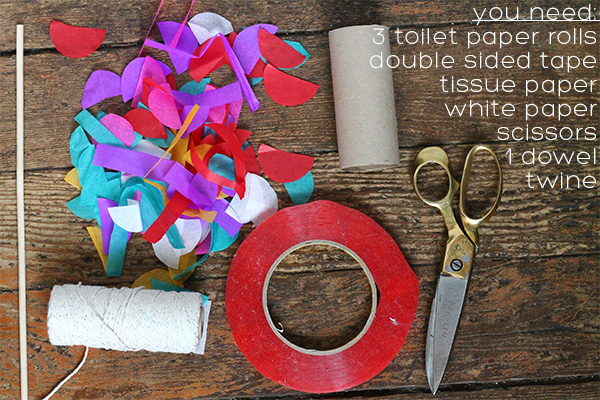
This DIY is very kid friendly. If you have a son or two (heck girls too!), why not celebrate Boy’s day with them and make some? Here’s what you need:

String or yarn can be used instead of twine.
If you do plan to wave these around like a mad man/boy, I suggest using hot glue gun for steps 8 and 9.
STEPS
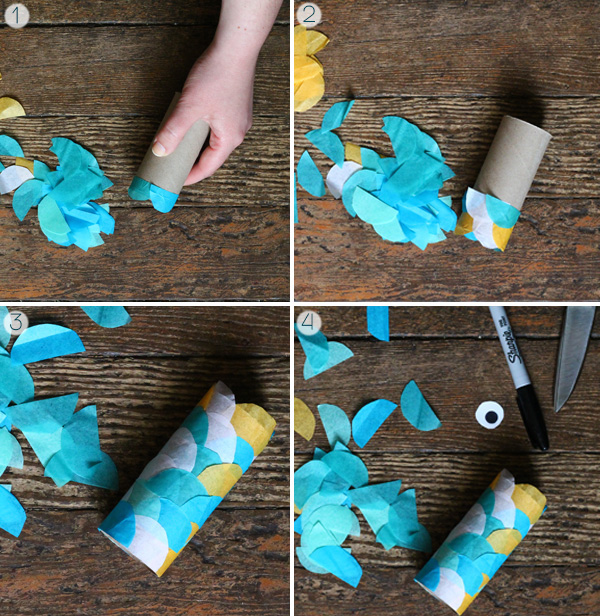
1 In 3-4 colors, cut out several circles of tissue paper, approx. 1.5 inches in diameter, then cut those in half to make semi circles. Place a piece of double sided tape around the bottom of your roll. Start placing the straight edge of each semi circle on the double sided tape, overlapping slightly so no roll shows underneath. Ensure the curved end of the semi circle hangs off the roll so it isn’t attached. This end will be the fish’s tail. Complete all the way around.
2 Leave a 5cm gap and place another strip of double sided tape around the roll, repeating with the semi circles. The colour order doesn’t matter much, just do what you think looks good. You will have to overlap a fair bit and not all the ends will be taped down. Leave them. The next layer should cover them.
3 Repeat all the way to the top, making sure you finish with the tape and half circles around the top of the roll. This is the head. At this point, if there are any half circles that are still sticking up, use double sided tape to stick them down.
4 Cut out a circle with white paper (approx. 1 inch in diameter) then use a black marker to draw a large circle inside for the eye. Use double sided tape to stick onto the side of the head.
5 Cut strips of tissue paper using the same colors as your semi circles. At the tail end, carefully place a piece of double sided tape around the inside bottom of the roll. One by one, stick a long piece of tissue paper to the tape, going all the way around until it’s covered.
6 Trim any ends if necessary so they’re about the same length. Repeat steps 1-6 to make two more carp.
7 Cut three pieces of twine about 7 inches long. Double knot each one onto your dowel, making sure the ends are even.
8 On the head side, place a piece of double sided tape inside the roll, opposite the eye. Start with the top knotted twine on the dowel and secure the loose ends onto the tape inside the roll. If you plan to swing this koinobori around, use hot glue instead, or place another piece of tape on top the twine.
9 Repeat on the opposite side, just behind the eye. Repeat for the next two carp.
The traditional koinobori colors are black, red, blue, green and sometimes purple or orange. Black is for the father, red for the eldest and so forth. But call me a non-traditionalist. I loved making these in all sorts of fun colors!


No comments:
Post a Comment
Please feel free to comment on any of my posts!