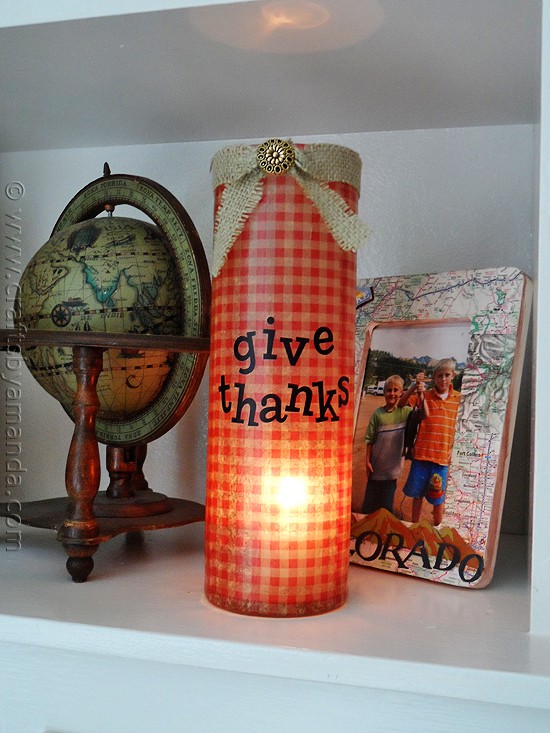
This vase is a great way to light up the season with simple colors and its easy to make as well. I hope you like it and hopefully it will inspire your creative side as well.

Supplies:
- Fall themed tissue paper
- Tall cylindrical glass vase
- Alphabet rub-ons
- Decoupage medium
- 12 "x1" strip of burlap
- Vintage button
- Hot glue gun
1. Turn vase upside down. Apply decoupage medium to vase, covering only a section about 3-4 inches wide.
2. Cut a strip of tissue paper about the same width. Line up the straight edge of the tissue paper with the top of the vase. Gently press down the center of the tissue paper, all the way down the length of the vase. Next, flatten the left side of the tissue paper against the glass and do the same for the right side. Trim off excess from the top of the vase.
3. Repeat these two steps until the vase is covered. Apply a coat of decoupage medium over the top of the tissue paper.2. Cut a strip of tissue paper about the same width. Line up the straight edge of the tissue paper with the top of the vase. Gently press down the center of the tissue paper, all the way down the length of the vase. Next, flatten the left side of the tissue paper against the glass and do the same for the right side. Trim off excess from the top of the vase.
4. Wrap burlap around the top of the vase while the decoupage is still wet. Tie into a knot and trim the ends. Allow the decoupage to dry completely.
5. When dry, apply rub-on letters "give thanks".
6. Use hot glue to secure the burlap to the top of the vase. Hot glue vintage button to the center of the knot.
7. You can fill the vase with flowers or fall foliage, or insert a candle and light for a lovely centerpiece.
Expert Tips & FAQsTo keep melted wax off the bottom of the inside of the vase, use a votive holder with the candle. That way you can remove the candle and continue to use as a vase if you like.

No comments:
Post a Comment
Please feel free to comment on any of my posts!