Tuesday, January 19, 2021

Scrapbooking Tips- Part 3

 This is the final part in my scrapbooking tips series. Enjoy!


5. Budget when you scrapbooking

  • Actually set a budget. If you set a spending limit, you’re more likely to stick to it.
  • Shop with a list. Know exactly what you’re looking for and only purchase those items. Resist the temptation to buy things you don’t actually need.
  • You don’t need as many supplies as you might think. Instead, look around your house for things you can use, like old fabric, clothing tags, buttons, office supplies, or ticket stubs. When it comes to scrapbooking, anything goes!
  • Don’t spend a ton of money on tools like die cutters right away. Experiment a bit to find your style, do some research to see what kinds of looks and techniques you like, and then make the purchase only if you think you’ll actually use it.

6. Extra Tips

  • Use dry glue to affix your design elements to the page. Wet glue like white or tacky glue can cause your paper or photos to crumple.
  • Store tiny embellishments like brads and eyelets in pill organizers.
  • Get the kids involved. They’re a great source of creative inspiration, and including their designs will add an extra personal touch to your layouts.
  • Bust out your old art supplies. Crayons, markers, and cheap watercolor paints are all great supplies for scrapbookers.
  • Create a color palette before you get started. Use your photo as inspiration, and choose your paper and embellishments using the color palette.
  • Use acid-free papers. Acid-free papers don’t contain chemicals that will yellow with age or break down or damage important documents and photos.
  • If you don’t have much time to scrapbook, try creating smaller pages like pocket pages.

And thats it! Happy Scrapbooking!

Monday, January 18, 2021

Scrapbooking Tips- Part 2

 This is a continuation of my last post on scrapbooking. I hope you enjoy this second post.


3. Embellishing

  • Add texture to your layouts by using materials like fabric, ribbon, paint, or even dried glue.
  • Use found objects like newspaper, magazine clippings, leaves, or pressed flowers to add texture and complement the theme of your layout. The only limit to what you can include on your layout is your creativity!
  • Layer paper to add dimension to your layouts. Get our tips for layering paper.
  • Save your scraps. You can do lots of things with paper scraps!
  • Try embossing. It looks amazing, and you don’t need any special tools to do it. Here’s how to emboss like a boss.
  • Bust out your button box. Unused or vintage buttons make great, low-cost embellishments.
  • Tear paper to create a more casual look.
  • Invest in some inkpads. You can use them for tons of things, like stamping or creating texture.
  • Ink the edges of torn paper by rubbing an inkpad along the torn edge. This adds color and heightens the texture.
  • Use textured paper to subtly add visual interest without overcomplicating your designs. Check out our textured papers.
  • Add mixed media elements to your layouts, like staples, fabric, wood, or plastic.
  • Translucent or transparent paper like vellum adds visual interest without overcomplicating your design.
  • Add DIY texture by crumpling card stock. Try running your paper under water, crumpling it, and then flattening it while using a towel to absorb the moisture. Be sure to let it dry completely before you use it.
  • Use envelopes to create pockets for journaling, photos, or embellishments like tags.
  • Simple patterns like stripes, dots, or chevrons are often the most eye-catching, while overcomplicated patterns like paisley or plaid can overwhelm your photo. Use complicated or detailed patterns sparingly.


4. Design

  • Choose a focal point. Your focal point will most often be a photo, but it can be whatever you like.
  • Don’t get hung up on using a clever page title. Not every page needs a title.
  • Decide on a theme before you start designing. Focusing on a particular event, person, or color scheme are all great theme ideas.
  • Don’t get locked into a particular layout. Let your layouts develop organically and allow them to change as your design evolves.
  • Try making two-page layouts. You’ll have more room to be creative, you can use more photos, and they’ll help create a sense of flow within your scrapbook.
  • Tell a story. A good title, arranging your photos in a certain way, and evocative journaling can help you tell the story behind your page.
  • Emphasize your focal point photos using mattes.
  • Don’t glue anything down until you’re sure you like where it is. Lay things out first, or use removable glue dots.
  • When in doubt, keep it simple. You can always add more later, but you can’t take things away once they’ve been glued down.
  • Use repeating patterns like polka dots or chevrons on multiple pages to create a sense of cohesiveness throughout your entire scrapbook.
  • Choose background and accent colors that complement your photos without overwhelming them. Start with neutral tones and work your way up to using flashy patterns.
  • Keep your design elements aligned. Alignment is just as important for scrapbooking as it is for graphic design – here’s why.
  • Embrace negative space. You don’t need to fill every nook and cranny of your layout with photos, journaling, or embellishments. Leave some space clear to add emphasis to your focal point. Learn more about using negative space.
  • If you’re really stuck, use a template or sketch for inspiration. You can find lots of layout ideas on Pinterest.

Sunday, January 17, 2021

Scrapbooking Tips- Part 1

 Scrapbooking may look complicated, but it’s easier than you think. It’s not about creating the most beautiful layout – scrapbooking is about creating a layout that speaks to you, and no one is better qualified for that job than you are. Here are some tips to help you out some if your just starting out.


1. Photos

  • Print multiple photos, especially if you plan on cutting them. That way, you’ll have a backup in case something goes wrong.
  • Start with recent photos. Don’t jump in using important photos like antique prints passed down from your grandparents or expensive shots like wedding photos, unless you can easily reprint new ones.
  • It’s totally okay to trim or crop excess sky, landscape, or background when necessary, but…
  • Don’t cut or trim heritage or antique photos, and…
  • Avoid cutting your photos into weird shapes. If you want to crop your photos, stick to the classic shapes like squares or ovals.
  • You don’t need to use every photo from an event or vacation on a particular page. Instead, narrow it down to a few of your favorites and focus on only the best memories.
  • Use different photo sizes for variety. Combine 3×5, 4×6, 5×7, 8×10, and even panoramic shots.
  • Combining black and white photos with color prints is a great way to incorporate multiple shots while keeping the spotlight on your focal photo.
  • Lightly write dates on the back of printed photos. This will make it easier to remember specific details about your photos if you don’t get a chance to scrapbook them till much later.


2. Writing:

  • Just write! Starting is the hardest part, and you can always adjust and edit your draft until it sounds perfect.
  • Handwrite your journaling. Handwritten text adds a personal touch compared to journaling that’s been printed off your computer. If you aren’t confident in your hand-lettering abilities, try typing and printing your journaling and tracing it.
  • If you don’t know what to say in your journaling, use a quote, poem, or song lyric.

Saturday, January 16, 2021

DIY Lavender Sachets

 These were so simple and fun to make, and they made my whole house smell like lavender!  I loved picking out my favorite prints to create fresh smelling stacks of sachets.

MATERIALS

Lavender Sachets | Purl Soho

To make twenty sachets:

SIZE

Each sachet is 3 1/2-inch square

PATTERN

CUTTING

Lavender Sachets | Purl Soho

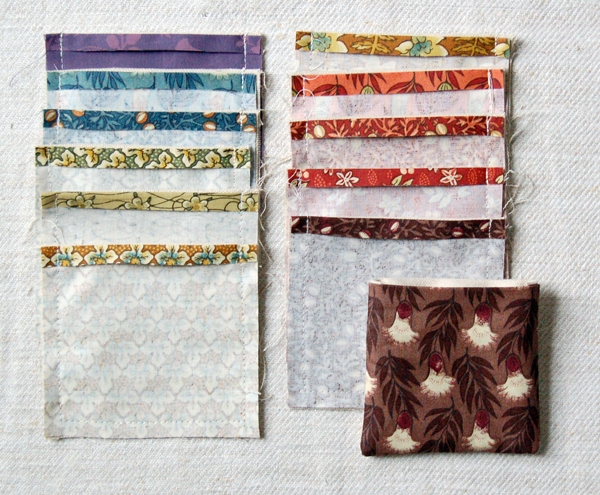
Pick out the fabrics you’d like to use from the roll of fabrics. In the example I am making a set of 12. If you’re going to give them or use them as a set make sure you like the way they look all together.

Cut each of the chintz fabrics into a 4-inch square.

Cut 12 (or however many sachets you’re making) 4-inch squares from the canvas, one for each of the chintz squares.

SEWING

Lavender Sachets | Purl Soho

Press one side of each of the cut squares 1/4-inch towards the wrong side.

Lavender Sachets | Purl Soho

Pin each chintz square to a canvas square, right sides together, with their folded sides lined up. Do not pin the folded sides.

Lavender Sachets | Purl Soho

Using the cotton sewing thread and a 1/4-inch seam allowance sew around the three pinned sides. Make sure to sew down the sides of the folds.

Turn sewn piece right sides out.

FILLING AND FINISHING

Lavender Sachets | Purl Soho

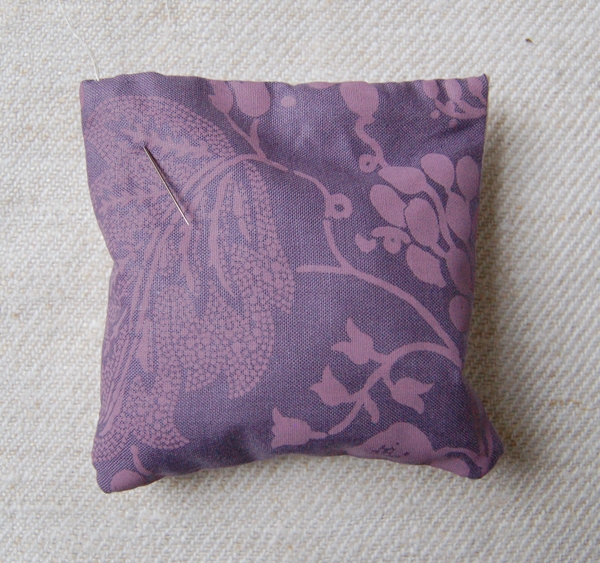
Fill each sewn pocket with 10 heaping teaspoons of lavender and pin it closed. Make sure that the folded edges are flush with one another and that no raw seams or stray threads are popping out past the pinned edge.

Lavender Sachets | Purl Soho

Using the hand quilting thread sew the sachet closed with a blind stitch: Start with the knot on the inside of the fold. Pull the needle through along the fold of the chintz side and exit 1/4-inch from the edge.

Lavender Sachets | Purl Soho

Push the needle through the opposite side’s fold (on the canvas side) directly across from the first exit point.

Go back and forth like this, sewing through the folds, until you reach the end of the open side. Tie a knot at the end.

Lavender Sachets | Purl Soho

Pull the thread through to the front of the sachet and snip it at the exit point to hide the end.

Lavender Sachets | Purl Soho

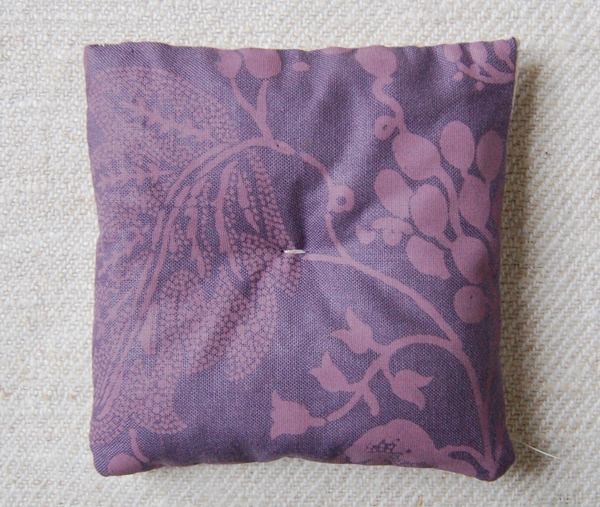
Thread an 18-inch length of the hand quilting thread and do not tie a knot. Starting from the canvas side of the sachet take a small horizontal tacking stitch through the sachet. Leave a 4-inch tail. Re-stitch over this stitch a few times and pull the stitch tight so that the sachet puckers towards the center, as shown above.

Lavender Sachets | Purl Soho

Double knot the working end of the thread to the tail on the canvas side, making sure to pull the knot tight to secure it. Hide the ends of the thread inside of the sachet as you did in the previous step and you’re all done!

Friday, January 15, 2021

Fabric Bookmarks

 Making Fabric Bookmarks

CUT:

  1. (3) 4×4” squares of fabric.  Your fabric can be all matching, different, or a mix.  There is no right way to do it.
  2. (2) 4×4” squares of interfacing.  Note: For interfacing, I prefer Pellon 911FF featherweight.  It gives your bookmark a little flex, but enough stability to protect the pages of the books.  I would not recommend getting anything lighter. If you want to use a stiffer interfacing it wouldn’t hurt the final product, it is just preference.  You can always experiment with these if you have different types available at home.

i. Cut one square of interfacing in half diagonally to make a triangle.  See photo below for reference.  Note: You will only use one half of the triangle.

preparing fabric for Fabric Bookmark

IRON:

After you have cut all your pieces, it is time to start ironing the interfacing to your fabric.

  1. Using the fabric that you want to hang over the pages of the book, Iron the half triangle interfacing onto the wrong side of the fabric.
  2. Then iron the square in half over the interfacing. This will create a triangle of fabric with interfacing in the center, with right sides having an open seam.
  3. Using the fabric square that you want to be the back of the bookmark, iron the full square of interfacing to the wrong side of that fabric square.
adding interfacing to Fabric Bookmark

4. Layer your squares like the photo below, right sides together.  The bottom layer is your NON-interfaced full square right side up.  Your triangle is in the middle.  Make sure the open corner with open seams is facing the top right.  Last, place your interfaced square, right side      down.

fabric Right Sides Together for Fabric Bookmark

5. Pin your layers together and sew with a 1/8″ seam allowance around the entire edge leaving a 1.25-inch opening so you can turn it right side out later. (Make sure this opening is on one of the 2 sides with only 2 layers, opposite the triangle. It makes it easier to close the opening after turning the bookmark right-side-out).

pinning fabric together for Fabric Bookmark
sewing Right Sides Together for Fabric Bookmark

6. Carefully trim the corners, and turn right side out.

7. Top stitch around the entire edge at 1/8″ seam allowance to close the opening.

8. That’s it! You’re done! You have a quick, fun, useful project to use up all those little bits of fabric.

Fabric Bookmark used for Books


FINISHED BOOKMARK


Thursday, January 14, 2021

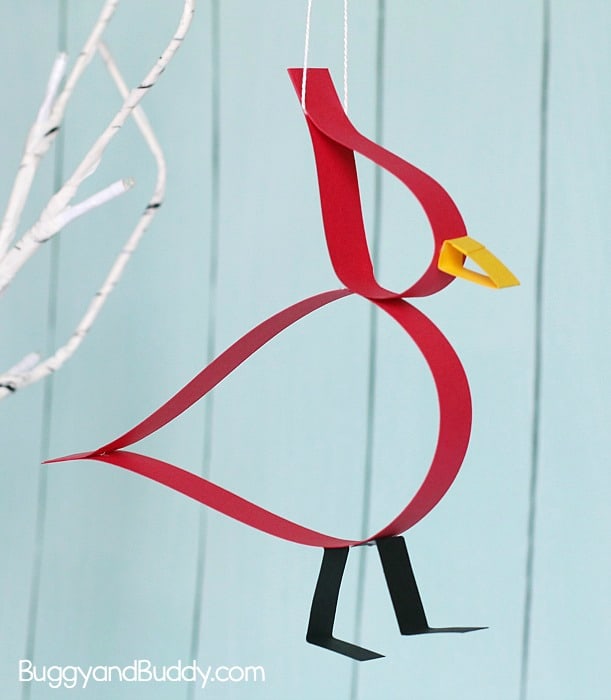
Paper Strip Cardinal Craft

 Paper Strip Cardinal Craft for Kids


Materials for Paper Cardinal Craft

Scissors or Paper Cutter (This is the paper cutter I use at home.)

Glue stick (We love using these glue sticks. They hold the paper together quickly and securely.)

Optional: String for hanging

Construction Paper or Cardstock Cut into the Following Sizes

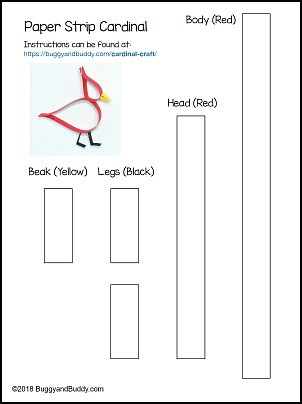
  • One red paper strip for the head: 6 inches x 3/4 inch
  • One red paper strip for the body: 11 inches x 3/4 inch
  • Two black paper strips for the legs: 2 inches x 3/4 inch
  • One yellow paper strip for the beak: 2 inches x 3/4 inch

Or you can print out our free paper cardinal craft template right onto white cardstock  and have kids color and cut out the strips themselves.

free template printable pdf for paper cardinal craft for kids


Directions for Paper Cardinal Craft

Cut your open paper strips using the dimensions above or print out the free template and color and cut out the paper strips.

crafts for kids using paper strips


1. Make the cardinal body by placing glue on one end of the 11 inch paper strip and sticking the other end on top forming a teardrop shape.

2. Do the same with the red, six-inch paper strip to form the head.

3. Glue the head on top of the body.


make a red cardinal using paper strips- fun craft for kids


4. To make the beak you’ll be folding the yellow strip into a triangle following the photos below. (The last photo of the beak below is reversed.)


make a beak for your paper bird craft


5. Glue the beak onto your bird.

6. Fold the two black strips of paper to form legs as shown below and glue them to your cardinal’s body.


add paper legs to your bird craft


6. Optional: Add string to hang your paper cardinal craft!


Easy Cardinal Craft for Kids Using Paper Strips- Perfect for winter or a unit on birds!

Wednesday, January 13, 2021

Bee Craft

 This easy and fun bee craft with heart-shaped wings includes a printable template, making it perfect for kids of all ages!


INGREDIENTS:

  • Paper Bee Template
  • White card stock
  • Washable paint
  • Paintbrushes
  • Scissors
  • Tacky craft glue
  • Large wiggly eyes
  • Black marker
  • Black pipe cleaners
  • Tape

INSTRUCTIONS:

  1. Print the template on white cardstock. You will need one template per child. When you are printing this template, be sure to have “actual size” checked in your printer menu.
  2. Next, invite kids to paint their template with washable paint.
  3. When the paint is dry, invite kids to cut out their shapes.
  4. Glue the bee’s wings, stinger, and eye to the body with tacky craft glue.
  5. Draw a mouth on the bee’s face with a black marker.
  6. Last, fold the black pipe cleaner in half, then tape it to the back of the bee’s head to make antennae.
  7. Your bee craft is complete.

Tuesday, January 12, 2021

DIY Playdough (No Cook)

 This easy DIY Playdough is easy to make and fun for kids to play with afterwards. With this recipe you can make any color you would like or even mix colors to make a special color.


HOW TO MAKE NO-COOK DIY PLAYDOUGH:

I created this recipe to make small batches so it would be easy and quick to make several colors. Each batch makes about one cup of play dough.

SUPPLIES:

• flour
• salt
• cooking oil
• food coloring
• large mixing bowl
• measuring cups and spoons
• aluminum foil, parchment paper or wax paper
• wooden spoon for stirring

Directions:

Start by combining the flour and salt in a medium bowl. Slowly stir in the oil, warm water, and about 2-3 drops of food coloring until the mixture is well combined.

Transfer the dough to a flat surface and let it sit for a few minutes. It may feel a bit sticky, but whatever you do, DO NOT add more flour! As the dough sits, the salt will absorb the extra moisture.

Let the dough sit for about 5-7 minutes, before kneading. If your dough is sticky after sitting, add an additional 2 tablespoons of flour at a time until it is the perfect consistency.

HOW TO STORE YOUR DIY PLAYDOUGH:

 Store in a zip-lock bag or airtight container, and place in the refrigerator. If you notice the playdough getting a bit dry, you can add a few drops of water and knead that into the dough. 

Monday, January 11, 2021

Dollar Tree Vases

 Most ladies are always looking for different ways to decorate their space. This post will show simple Dollar Tree Vases.

1. Dollar Tree Rope Vase- All you need for this vase is: a vase, rope, and hot glue


2. Confetti Vase- All you need for this is; A vase and your favorite fingernail polish. Use the darkest nail polish first and create dots using the nail polish brush. To achieve a confetti shape, wipe off excess paint and brush the paint on using a short motion. For more of a polka dot shape, dip your brush and lightly touch the vase with the tip of the brush.


3. Buffalo Plaid Vase- All you need for this is: Buffalo Plaid Wrapping Paper or Cardstock, Double-sided Tape, Scissors, Glass Vase or glass candle. Gather supplies. Make sure your vase is flat on all sides, otherwise you will have bunching in the paper. Place the vase on the paper to determine the size sheet you need to cut. Leave about 1 inch on each side that you will fold. Cut to size. Measure the vase along with the paper and fold each side to make it the same size as the vase. Trim access paper. Apply double-sided tape along the top and both sides of the paper. I did not apply tape to the bottom. Apply double-sided tape along the top and both sides of the paper. I did not apply tape to the bottom. Roll the vase around the paper and press firmly to secure.


4. Wrapped Patterned Vases- All you need for this is: Woven Printed Removable Wallpaper (I purchased sample pieces from Spoonflower and was able to make 3-4 average sized vases per sample sheet), Silhouette Printable Gold FoilCylindrical Glass Vase, Scissors and measuring tape. Begin by measuring the circumference of your vase and cut a strip of vinyl to this size about 3″ shorter that the height of the vase. Slowly wrap the wallpaper strip around the top of the vase working out the air bubbles as you go. You will want to make sure that the wallpaper remains level on the glass as you work your way around. This is where having a perfectly cylindrical vase helps. Once the wallpaper is wrapped around the vase, cut a strip of gold vinyl the same length as the circumference of your vase and 3″ tall. Slowly wrap the gold vinyl around the vase working out the air bubbles as you go and making sure to overlap the wallpaper by 1/8″ or so.


5. Ribbon Wrapped Vase- All you need  for this on is: a vase and ribbon. Simply wrap the ribbon around the vase for whatever style you like.


6. DIY Candle Vases- All you need for this vase is: a vase, stones and hot glue.


7.  Lace Vase- All you need for this vase is: a vace, a lace dolly and hot glue.


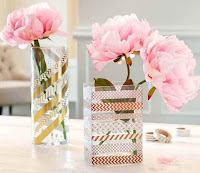
8. Washi Tape Vase- All you need for this vase is: a vase, and washi tape. Create any design you want with this easy vase.


9. Glitter Vases- All you need for this vase is: a vase, glue, and glitter. Come up with your own designs to make this vase fit your space.


10. Flower Vase- All you need for this vase is: a vase, artificial flowers, and hot glue. Unfortunately I don’t have a picture for this one. But this vase is fairly simple to do, all you have to do is glue the flowers  on the vase.


Dr. Seuss - Red Foot, Blue Foot

                                   In this craft we are going to create our own foot book. It is an exciting craft for little ones! What you...