Monday, November 30, 2020

Sunday, November 29, 2020

Easy Fall Wreath


 Decorate your home by making a 15-minute fall wreath.

Use hot glue to secure the end of your burlap ribbon to a styrofoam wreath. Wrap the burlap until it covers the wreath and secure it again.

Use hot glue to attach styrofoam pumpkins and faux fall leaves to the burlap. It’s that simple!


Saturday, November 28, 2020

Friday, November 27, 2020

Easy Fall Wine Glass


Mark your wine glass with a simple acorn charm.

Use styrofoam acorns, Mod Podge, glitter, hot glue and floral wire.

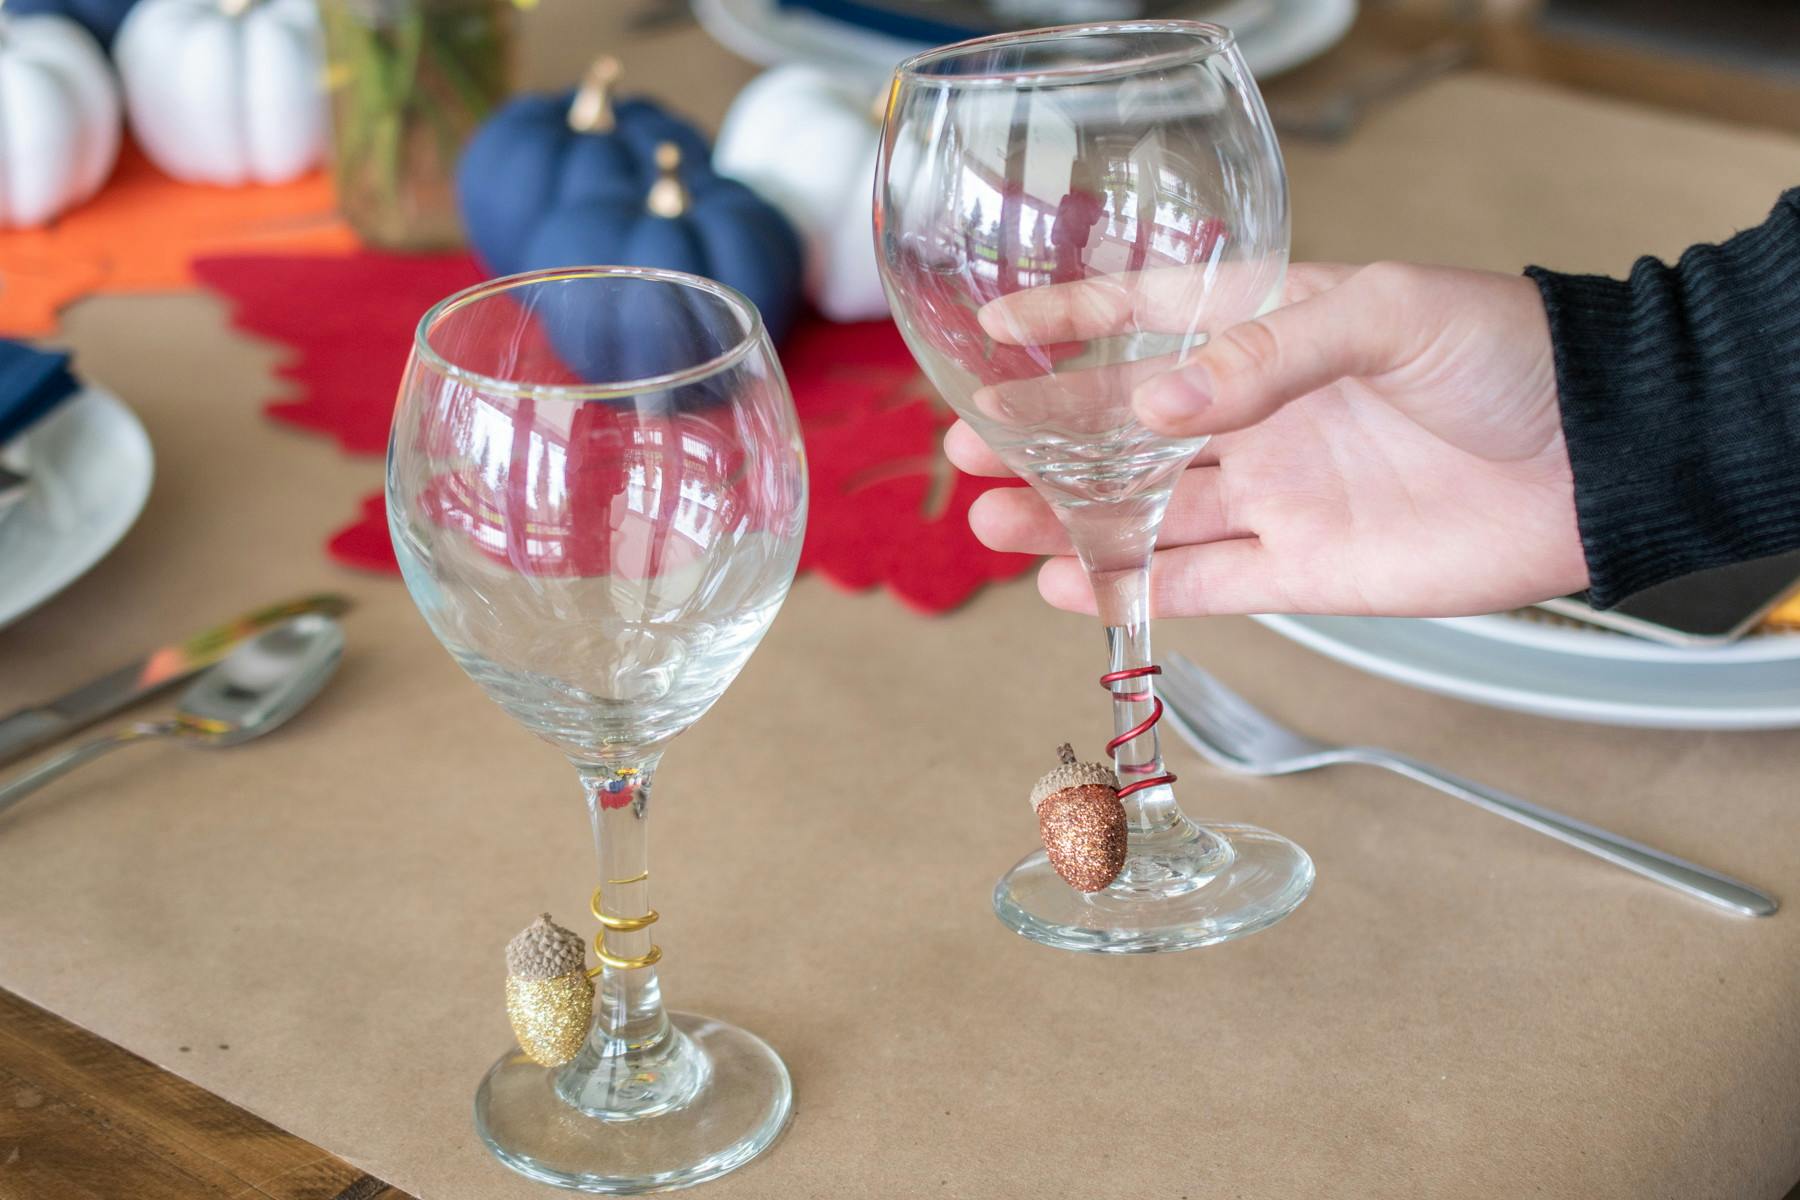
Paint the styrofoam acorn with Mod Podge, then roll it in glitter. Once the acorn has dried, cut a piece of floral wire 2-3″ long.

Gently push the wire halfway through the styrofoam part of the acorn. Secure it in place with a dab of hot glue.

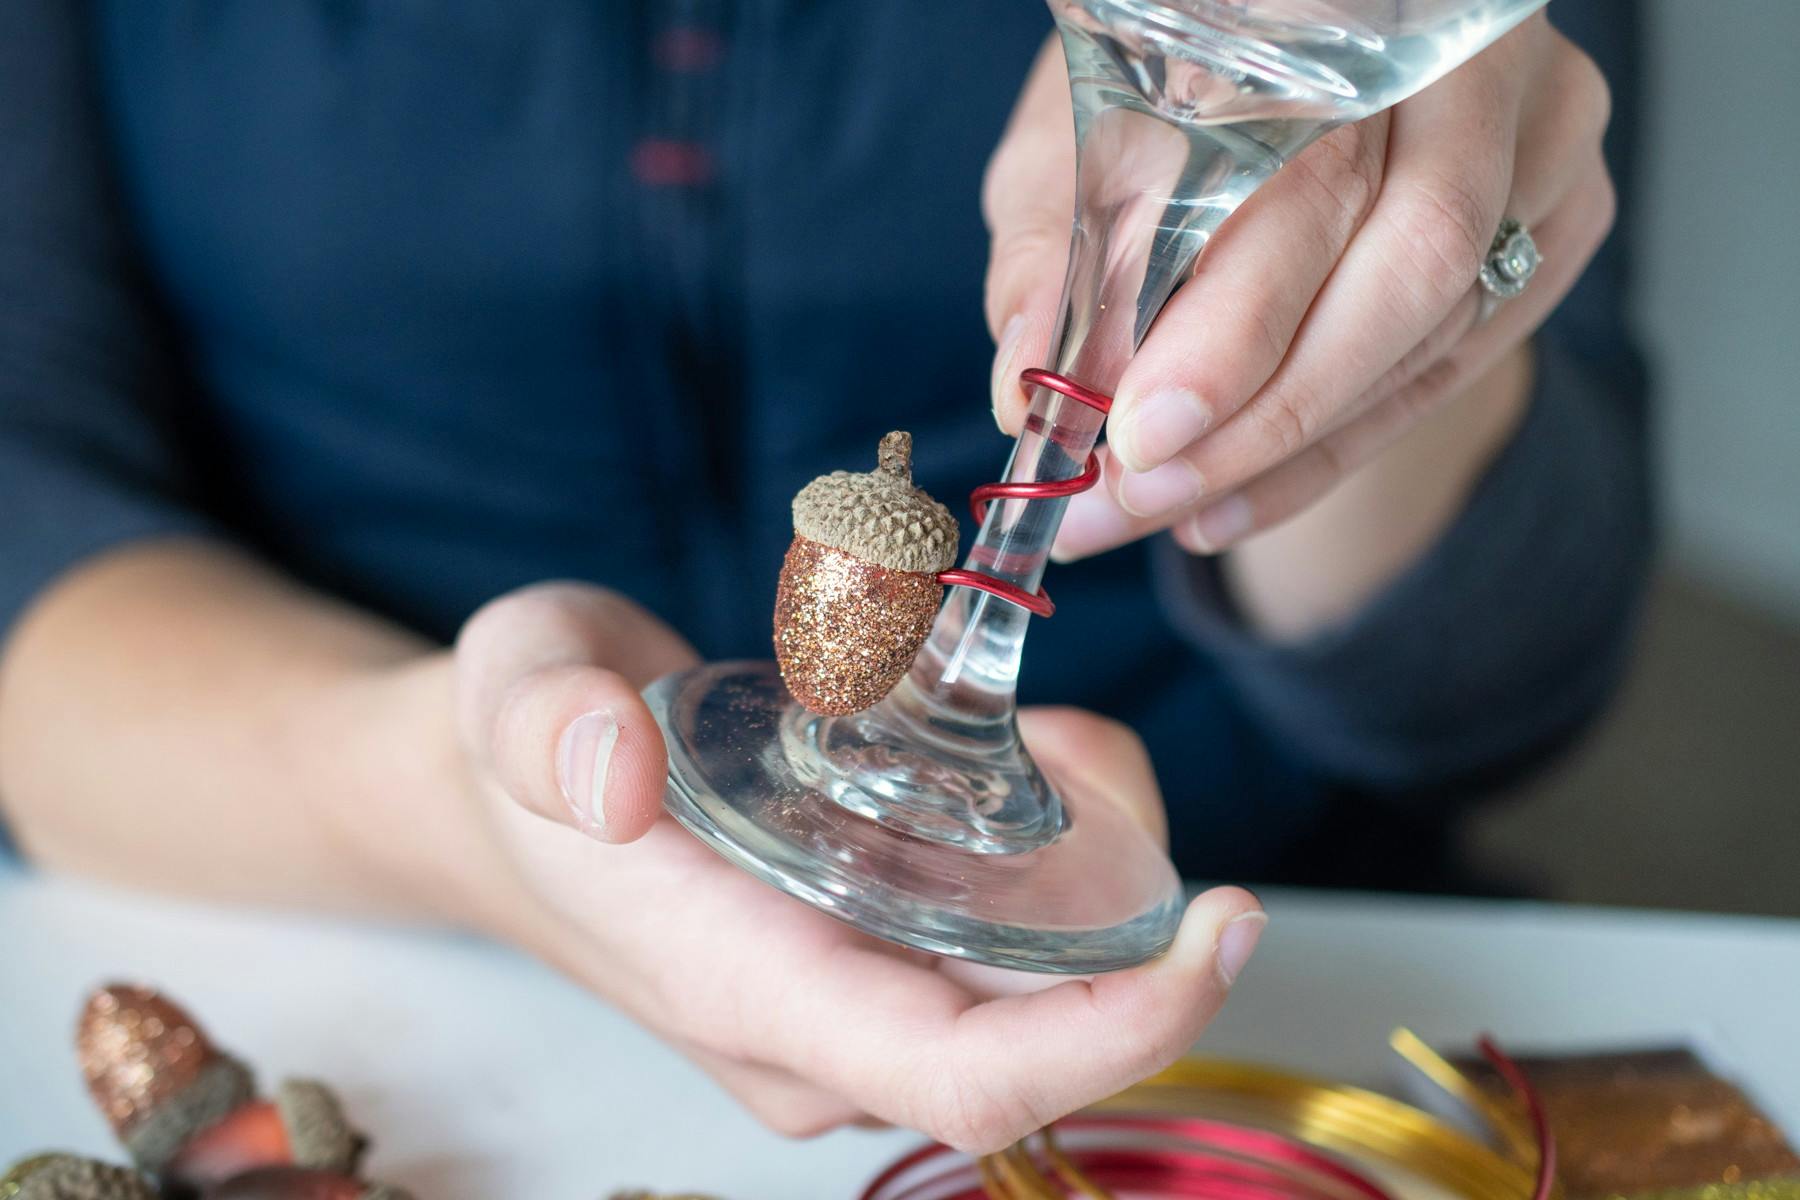
Gently wrap the wire with the acorn attached to the stem of your wine glass.


Thursday, November 26, 2020

PAINTED ROCK CORNUCOPIA

This craft is fun for any age so have lots of fun!!!!

Make a painted rock cornucopia for Thanksgiving!

 Materials:
  • Rocks
  • Water
  • Dish soap
  • Brush
  • Drying rack
  • Paint pens (We used POSCA)
  • Fine, permanent markers (We used micron)
  • Scissors
  • Large brown bag

We always find these items helpful too:

Make-it-your-own.com (Crafts & activities for kids)

  • Smock
  • Craft tray

Directions:

  • Go out for a walk with an adult and collect rocks that you think represent the shapes of the harvest vegetables.
  • Wash the dust off your rocks.  (This allows the paint to adhere better.)  Allow your rocks to dry overnight.  Popping them on a cooling rack allows the underside to dry as well.
  • Don your smock.  Follow the directions on your paint pens.  (The majority of brands instruct you to shake them before use and detail how to get the paint into the nib).  Outline the shape of the vegetable you want to paint and then colour it in.  The outline creates almost a dam of sorts, preventing the paint from escaping.  The brand that we used had excellent flow, so this wasn’t an issue.
  • Once your general shape is completely dry, add details, reflective highlights etc. with other colours and follow this with your thin permanent marker.
  • We experimented with a few different techniques to explore with the paints which might help you to create shapes to work with.  We applied the paint to the bubbles on bubble wrap and punched holes in an office label, applying to a rock and painting in the holes to create kernels on the cobs of corn.  We used strips of the labels to create ribs on the pumpkins. See what you can come up with!
  • Now to create the cornucopia:  Remove the handles from your bag and open the bottom of it carefully.  On the one end, roll the bag down and on the other end twist it together.  You may need a little bit of help from an adult for this.  Once you are done, enjoy putting your harvest vegetables inside and playing with them!
  • If you give this project a try, please tag us!  We love to see how you “made it your own”!

Wednesday, November 25, 2020

Thankful For Chalkboard


Use a dollar store chalkboard and vinyl sticker to give your dinner guests a special place to write what they’re thankful for.

Before you apply your vinyl or write on your chalkboard, place a piece of chalk on its side and rub it in one direction over the entire board. Repeat this process in the other direction.

This preps the board so when you have to erase whatever words you write later on, they’ll erase completely.

At the end of your Thanksgiving celebration, send the chalkboards home with your guests, or hang on to them for future Thanksgivings.

Tuesday, November 24, 2020

Make A Pilgrim Hat Holder

Make this simple pilgrim hat holder for your table of mantle!


To make the hat, use an X-Acto knife to cut the bottom out of a black paper cup. Cut a buckle and hat brim out of cardstock and glue them in place. To get a perfect circle, use a small bowl or a roll of packing tape as a template.

Monday, November 23, 2020

Thanksgiving Thankful Turkey Book

Thanksgiving Thankful Turkey Book

 Journaling in Our Thankful Turkey Kids Book Craft + More Thanksgiving Crafts for Kids at B-Inspired Mama

Equipment

  • hole punch
  • scissors

Materials

To Make the Book

  • 3 paper lunch bag(s)
  • 1 rubber band(s)
  • 1 craft stick(s)
  • construction paper brown, red, and yellow
  • card stock brown
  • recycled cardstock packaging such as from cereal boxes
  • 2 googly eyes
  • glue

To Use Inside the Book

  • family photos optional
  • Thanksgiving stickers optional
  • crayons optional
  • markers optional

Instructions

  • With the lunch bags stacked on top of one another, fold them in half to form a "book". Punch two holes along the folded edge of the bags.
    First Steps for Making Our Thankful Turkey Kids Book Craft + More Thanksgiving Crafts for Kids at B-Inspired Mama
  • From the back, insert each end of one rubber band through each hole. Insert the craft stick through the rubber band loops to secure it to the folded edge of the book.
    Next Steps for Making Our Thankful Turkey Kids Book Craft + More Thanksgiving Crafts for Kids at B-Inspired Mama
  • Create the turkey face on the front of the book by cutting out and gluing on a yellow triangle for a beak and a red teardrop shape for the wattle. Add googly eyes.
  • Add the tail feathers by cutting feather shapes from recycled cardstock (such as cereal boxes) and gluing them onto the top edge of the back of the book.
  • Cut a piece of brown cardstock paper a little bit larger than the size of the book and glue it onto the back of the book, over the tail feathers, to add support to the book.
  • Use photos, Thanksgiving stickers, collage, coloring, drawing, and/or writing to document what you are thankful for on the pages of your Thankful Turkey Book!
    Journaling in Our Thankful Turkey Kids Book Craft + More Thanksgiving Crafts for Kids at B-Inspired Mama

Dr. Seuss - Red Foot, Blue Foot

                                   In this craft we are going to create our own foot book. It is an exciting craft for little ones! What you...